| インポート設定 |
| 項目設定で作成した項目を元にインポートの際に使用する項目を設定します。 |
|
 |
 インポート設定画面(データシート詳細設定) インポート設定画面(データシート詳細設定) |
|
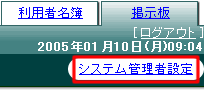
| 1.”システム管理者設定”リンクをクリック |
”システム管理者設定”リンクをクリックしてください。
※利用者が「運用管理者」の場合は、”運用管理者設定”リンクとなります。 |
|
| ■ メインメニューの”システム管理者設定”リンク |
 |
|
|
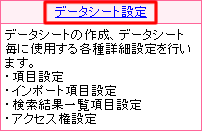
| 2.”データシート設定”リンクをクリックする |
| サブメニュー上部に表示されている”データシート設定”リンクをクリックして下さい。 |
|
| ■ データシート設定メニューの”データシート設定”リンク |
 |
 |
|
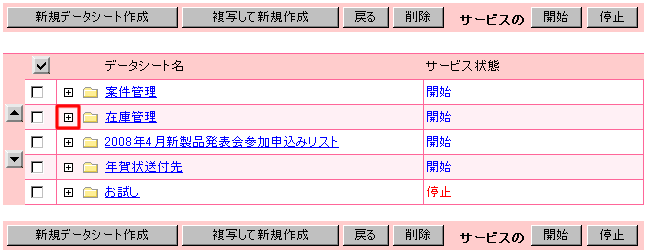
3.  をクリックする をクリックする |
| データシート名の左に表示されているイメージをクリックして下さい。 |
|
|
|
|
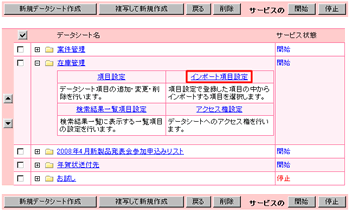
| 4.”インポート設定”リンクをクリックする |
| データシート名の下に表示されたメニューの中から”インポート設定”リンクをクリックしてください。 |
|
| ■ 詳細設定メニューの”インポート設定”リンク |
 |
|
|
| インポート項目の設定 |
|
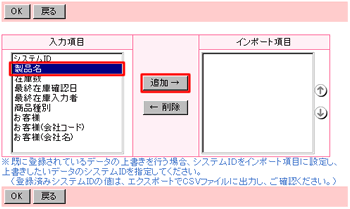
| 1.項目を選択する |
インポートする際の項目を”入力項目”一覧から選択して、”インポート項目”一覧に追加してください。
※システムIDをインポート項目に設定した場合、既存データの更新になります。 |
|
| ■ 項目を選択して[追加→]ボタンをクリック |
 |
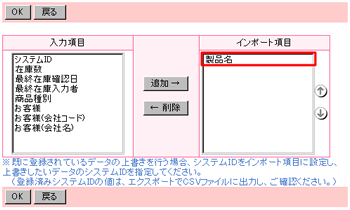
| ■ ”インポート項目”一覧に項目が追加される |
 |
|
|
| 2.[OK]ボタンをクリック |
| ”インポート項目”一覧への追加が終わりましたら[OK]ボタンをクリックしてください。 |
|
| |
|
|